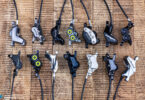
Headset cable routing is currently one of the most controversial topics in our sector and is setting the mountain bike forums on fire. Our world is divided into equal parts excitement and revulsion. But is the scepticism justified? What are the pros and what are the cons? We locked ourselves in our workshop to give you an overview of all the current systems.
Table of content: What you can expect
- The three types of cable routing you’ll find on a mountain bike
- Every home mechanic’s wet dream: external cable routing
- Elegance matters! The (traditional) internal cable routing
- The great agitator: internal headset routing
- Keep it simple: Acros’ “classic” solution
- The spaghetti monster: FOCUS CIS
- Scotty, integrate me aboard: SCOTT’s solution
- Spanish Special: Orbea’s own creation
- What are the pros and cons of the internal headset cable routing?
- Quick fire: a brief Q&A about internal cable routing
- What does the future have in store for us?
- Our conclusions about the different cable routing systems
If you like to hang out on mountain bike forums, you must have noticed that there’s one topic that’s currently splitting our small, fantastic world: internal headset cable routing. The reason for this is that increasingly more manufacturers are implementing the new routing concept on their bikes. And if you’ve been around for the last decade or so, you might be getting a flashback now. Back then, we had a similar debate, with “traditional” internal cable routing systems shaking up the cycling world. Fast forward a few years, and internal cable routing has become an integral part of modern bike design. Yep, much ado about nothing, because the commotion has clearly died down despite the initial scepticism. Most of us have got used to internal cable routing and some have even grown fond of it. In a nutshell: internal cable routing has become the new normal.
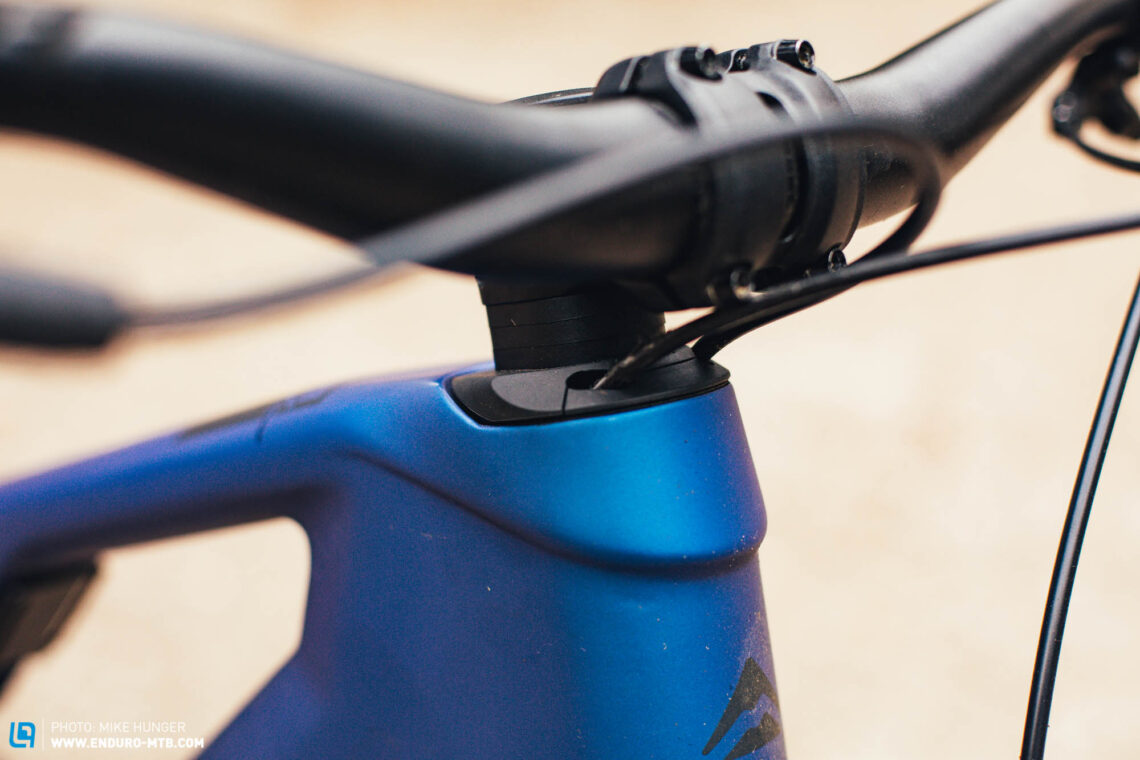
Internal cable routing through the headset.
Like with most things in life, it’s always worth looking beyond the end of our stems… erm, noses, and that’s also the case for cable integration. Despite being fundamentally different, bike categories have always learned from each other, and hopefully will keep doing so in the future. Disc brakes, for example, can be found on most road bikes now. But when it comes to cable routing and clean looks, our friends the roadies – yes, those with tight lycra shorts and eerily narrow tires – are way ahead of us. In other words, you’ll struggle to find many modern road bikes without fully internal cable routing. Instead, all brake lines and shift cables disappear into the frame, only reappearing briefly at their point of destination. And in all honesty, that’s a pretty great look! However, mountain bikes are not road bikes, and thus have an entirely different set of demands and problems, making it difficult (and perhaps a little dangerous) to blindly follow every new trend.
Our lycra friends realised a long time ago that hiding the cables in the frame looks extremely good.
The fact that more and more bike manufacturers are jumping on the headset routing wagon was the perfect excuse for us to take a closer look at all the existing systems. Let’s be honest: there are plenty of strong opinions out there, but few are backed by knowledge. We bet that most keyboard warriors haven’t even held one of these systems in their hands yet. We want to break down the wall of prejudice towards internal headset routing and show you all the pros and cons of each system, objectively and impartially, regardless of our personal preferences. Unlike most forum trolls, we’ve actually gathered plenty of experience with the different concepts over the years, taking apart and reassembling most systems during our practical tests. We might have cursed a little in the process, but we’ve done our homework and can tell you exactly what’s good and what’s not.

The three types of cable routing you’ll find on a mountain bike.
Broadly speaking, there are three different cable routing concepts. The first and most rudimentary is external cable routing, which guides all the cables on the outside of the frame. However, this usually excludes the dropper post cable, which is routed internally from the cockpit to the dropper post inside the seat tube for merely functional reasons.

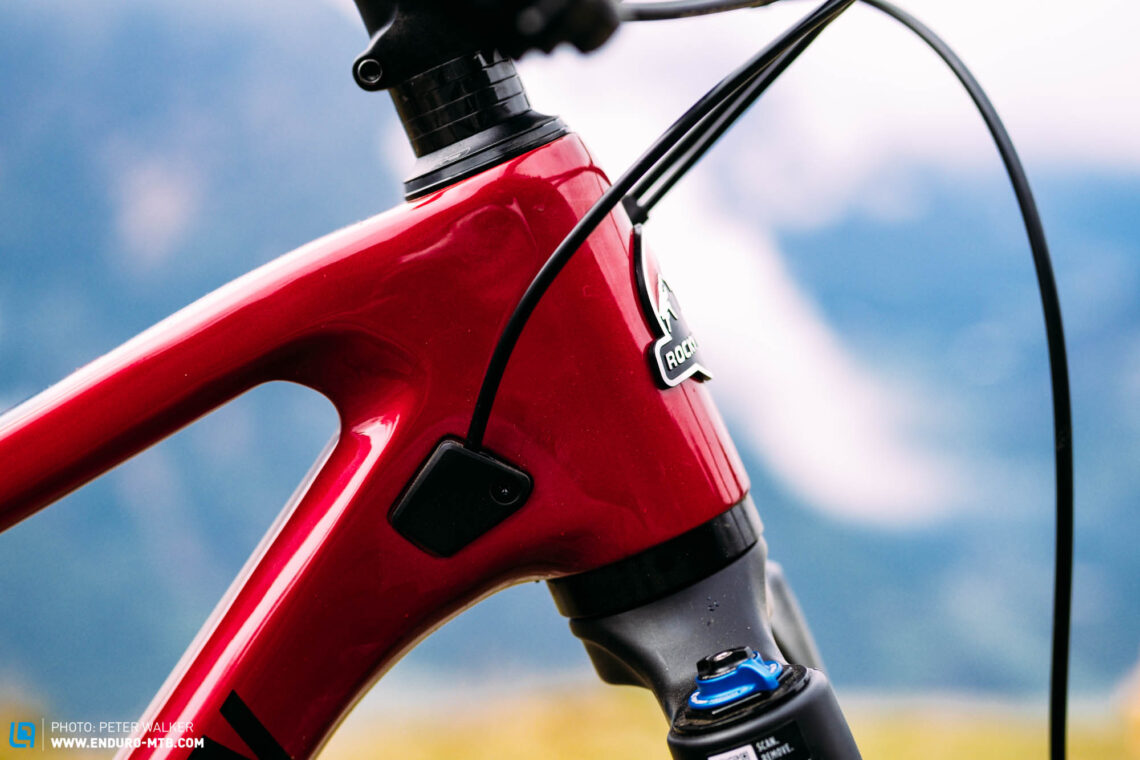
Over the years, bikes with external cable routing have been gradually replaced by frames with internal cable routing. With the latter, the brake lines and cables disappear into the frame through cable ports, which are usually positioned in the head tube area. With some bikes, the cables are routed externally at the transition from the main frame triangle to the swingarm. Inside the frame, the cables can either be routed directly through the down tube, or guided through additional sleeves.
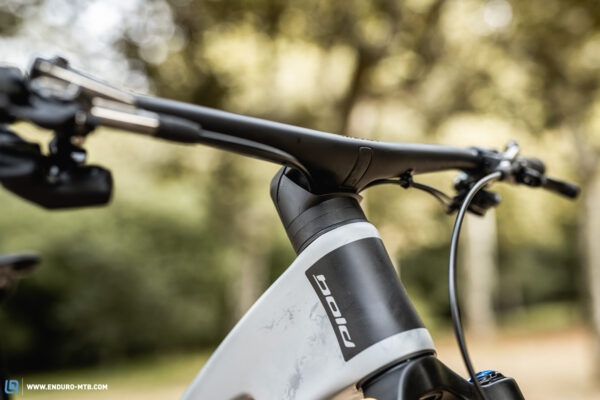
The latest cable routing standard is the headset routing. While in principle this follows a similar concept as the conventional internal cable routing, the cables disappear into the frame through the headset rather than cable ports. Depending on the system, the lines might run through the stem, inside the headset spacers, or just straight into the headset cover. This allows manufacturers to dispose of cable ports, and also to route the cables closer to the handlebars.
On your tools, get set, go! All the different cable routing systems at a glance.
Every home mechanic’s wet dream: external cable routing.
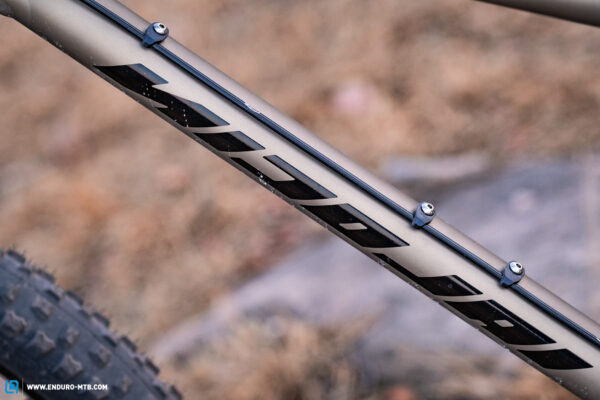
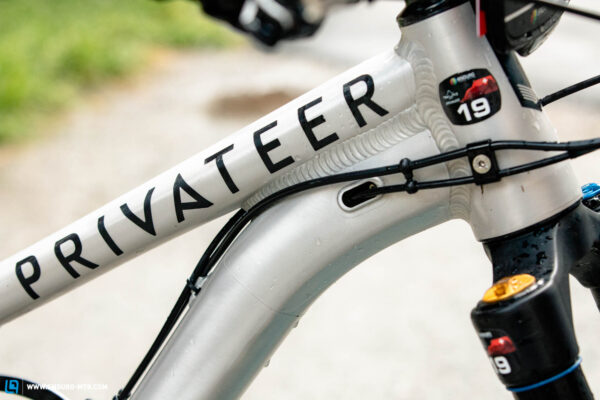
While bikes with external cable routing are becoming a rare sight, they’re still incredibly popular. But why? Because they’re a true godsend for home mechanics – but more on this later! With external routing, manufacturers follow a few different approaches, which can be more or less pleasant to look at. Let’s start with the different clamping systems, which range from basic, rather unattractive zip-tie eyelets to elegant bolted clamps. Overall, external cable routing can be found either on cheap entry-level models, or bikes from small boutique brands like RAAW, NICOLAI and Privateer, for example, who use ease of maintenance as a unique selling point.
If you like to work on your own bike and don’t mind a more industrial look, external cable routing might be your best option. When you ride loads, you usually work on your bike more, which makes a simpler system your best bet. If you’re hopping from one race to another without a team or a mechanic, you’ll be glad to be able to replace a torn shift cable without faffing around for an hour, especially when the clock is ticking.
Elegance matters! The (traditional) internal cable routing
Internal cable routing is far more common than external solutions, and an overall more elegant solution. The cables disappear into the frame through cable ports, running to their respective exit points either directly through the down tube or through additional guides. What might sound like a small difference at first, makes a huge difference in real life when you build your bike. Without a guide in the frame, the cable disappears into the frame through a cable port, never to be seen again, and trying to get the cable out on the other side requires a great deal of patience, planning, experience and luck. There are a few contraptions that will make your life easier, from magnets to cable guides and wires – and you can even glue the new cable to the old one to use it as a guide – but it can still be a lengthy and frustrating process. In a nutshell, routing cables really sucks, taking your average workshop swear fest to a whole new level and making your blood pressure rise when you’re under pressure before a race. This type of internal cable routing can be found on many modern mountain bikes, regardless of the price category – the Canyon Strive CFR or the Specialized Stumpjumper EVO Elite Alloy are just two of them.
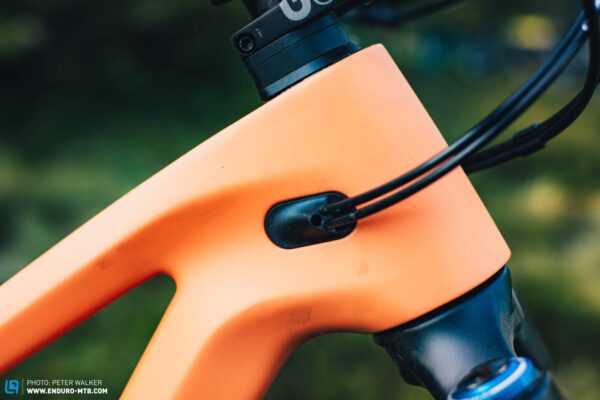
It’s a whole different story when the cables are routed through additional sleeves and guided from the entry port straight to the exit. This saves you nerve-wrecking cable fishing attempts and allows you to simply push the cable through the frame. And while this type of internal cable routing is the most elegant solution, it’s also the most complex and expensive one to implement for manufacturers. Integrating guide sleeves into a carbon frame is a laborious procedure, which means that you’ll only get them with very expensive bikes. Santa Cruz, for example, use an internal cable sleeve across their entire mountain bike range, including the Megatower X01 AXS RSV and 5010 CC X01 AXS RSV MX, for example. Specialized do the same with their flagship S-Works models, like the Stumpjumper EVO S-Works and S-Works Enduro. American cult brand Yeti uses cable guides too, for example on the SB160 T3 and SB140 TLR T3.
The advantages of internal cable routing are obvious. On one hand, it ensures a cleaner, more elegant look, because the cables disappear discreetly into the frame. On the other, the cables are safely tucked away and protected against the elements and impacts. However, not all that glitters is gold, which is also (and especially) true for internal routing systems without guides. The absence of sleeves makes it a lot harder to install or replace a cable, significantly increasing the frustration factor compared to externally routed cables. However, it’s a whole different story when you have a cable guide in the frame. Furthermore, we can tell you from experience that many manufacturers are still struggling to secure the cables firmly enough to prevent them from rattling. In this respect, the quality of the cable ports makes a big difference: while high quality solutions generally ensure a quiet ride, rudimentary plastic plugs and big, unsightly openings in the frame cause the cables to rattle loudly on the trail.

While the Yeti SB160 T3 would look incredibly good even with externally routed cables, the internal routing definitely contributes to the clean, elegant look.
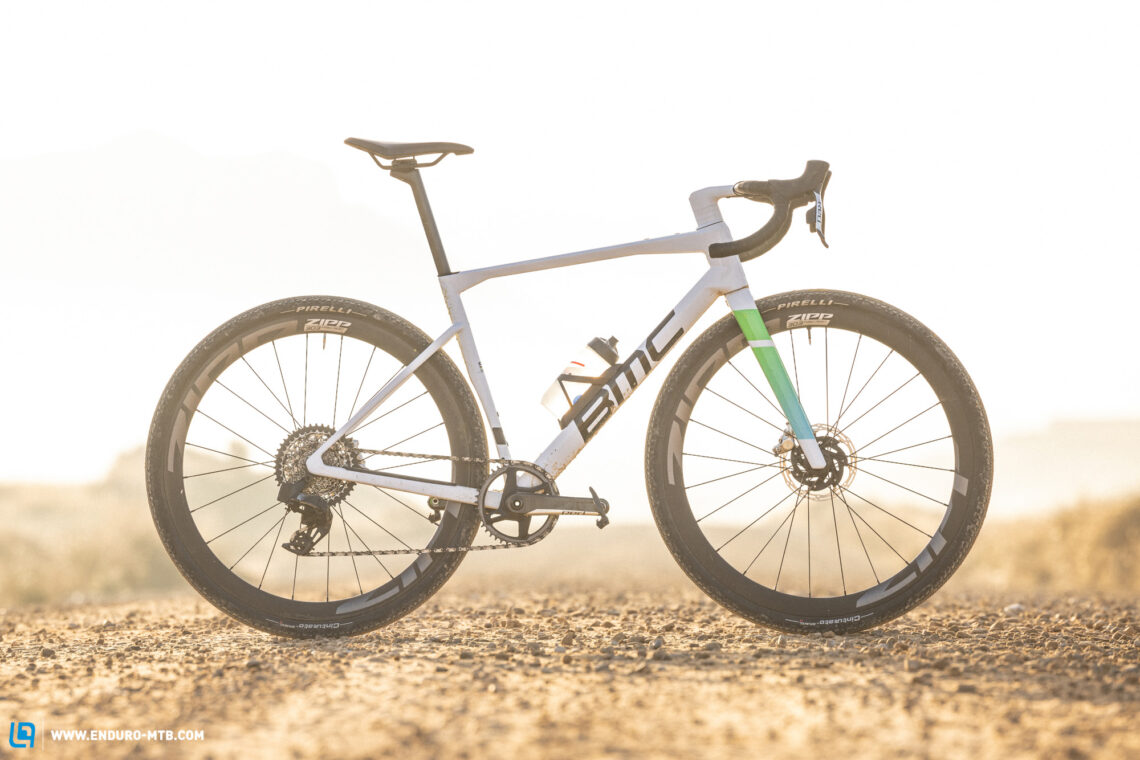
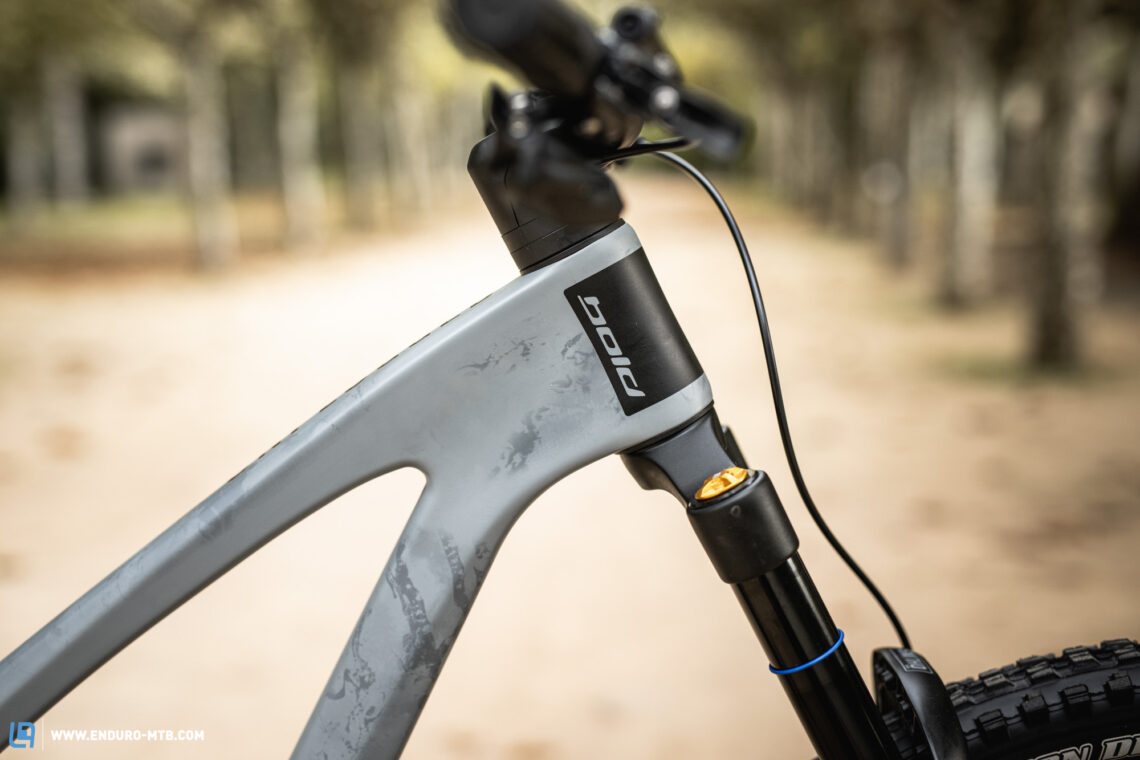
The great agitator: internal headset routing
It’s time to address the elephant in the room, the comment-section ignitor, the mountain biker’s latest antichrist: the internal headset cable routing. Quite obviously, this is the tidiest, most integrated routing solution out there, feeding the cables into the frame through the headset without the need for cable ports. We took a closer look at some of the most popular systems: we took them apart, reassembled them, removed the spacers and put them back on, thoroughly cleaning the headset in the process to recreate the most realistic scenario possible. This way, we’re able to tell you exactly what the pros and cons of the different systems are – the swearing parade was well worth it!
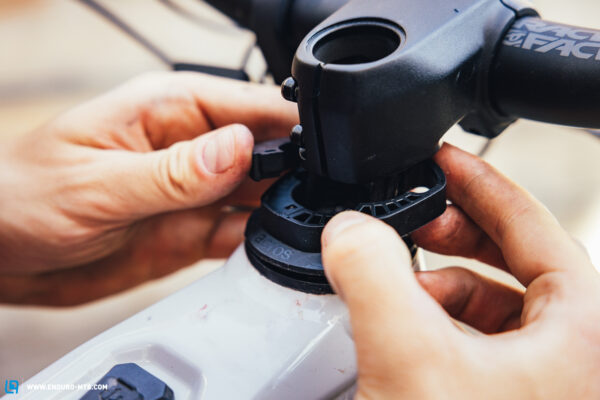
In essence, all headset routing systems are based on a similar concept, at the heart of which lies a slotted compression ring. This sits inside the head tube, right between the steerer tube and bearings, allowing the cables to run through the headset without interfering with the bearings or the steerer tube itself. While all concepts rely on the same core mechanism, each system employs a different top assembly. Every manufacturer uses their own solution, each of which has its pros and cons. Some route the cables directly into the upper bearing cover, while others thread them straight through the stem, spacers, or a special stem cover. Below, we’ll tell you exactly how the individual systems work.
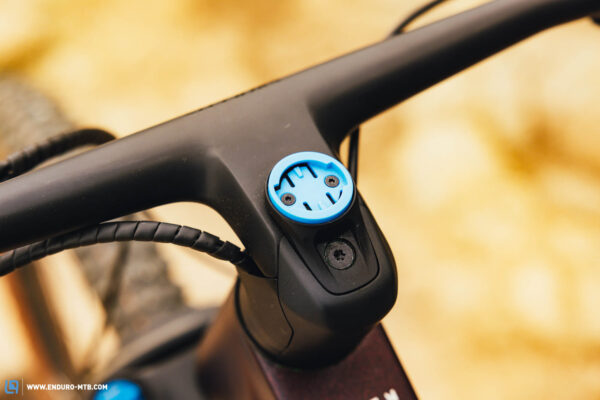
Keep it simple: Acros’ “classic” solution.
Let’s start with a “classic” solution from market leader Acros, which has served as a reference for many other manufacturers. Not only is this the simplest concept, but also the one that has inspired most of the existing headset routing systems. The cables run into the head tube through a couple of holes in the headset cover, where they are securely held in place by two plastic plugs that wedge snugly into the openings. Under the cover, right between the steerer tube and headset hides a slotted compression ring that allows you to feed the cables straight into the frame. As a result, the cables can be easily threaded in and out, even if the compression ring gets damaged in a crash. We found out the hard way that this can happen, when we smashed head-first into a tree, shattering the plastic compression ring in a million pieces.

The cables run through the holes in the slotted compression ring, which sits right between the steerer tube and the bearing.

Here the cables run through the headset cover directly into the frame. Adjusting the cockpit height is not a problem either!
If you feel brave and start taking the headset apart, you’ll realise that this isn’t much harder than removing a normal headset. Just loosen the stem bolts and the preload bolt on the top cap, pull down the fork and remove the slotted headset cover. Now you can easily access the headset and carry out simple maintenance tasks, such as cleaning or regreasing the bearings. The only drawback is that you’ll have to work your way around the cables, but this isn’t too much of a hassle. If you want to change the bearings, however, you’ll have to remove the brake lever from the brake line that is routed through the frame. While most dropper post levers fit easily through the headset bearing, the shifter is usually a tight squeeze, meaning that you’ll have to detach it from the shift cable. However, this really depends on the size of your bearings and the shifter – and anyway, you’ll have the same issue with all other systems currently available on the market.
One of the biggest advantages of the “classic” headset routing is that adjusting the cockpit height with spacers is fairly easy. Without wanting to give too much away, you’ll soon realise that this isn’t always a given! Reassembling the headset, on the other hand, is a little more complex than taking it apart. First off, you’ll have to feed all the cables through the slots in the compression ring, which can be a tight squeeze depending on the number of cables. The headset cover and the slotted compression ring are interlocked with a pin, but since the cables are always under tension, getting them to lock in place requires a steady hand and lots of patience. Finally, you’ll have to press the plastic plugs back into the slots of the headset cover, which poses a major challenge to your fine motor skills. All in all, the “classic” Acros headset routing is pretty intuitive and can be easily installed by just one person, which is something that isn’t always obvious with headset cable routing – trust us, we know what we’re talking about!
Examples of bikes currently available on the market with the “classic system”: SIMPLON Rapcon, CUBE Stereo ONE55t, MERIDA ONE-SIXTY 8000 (same concept, just implemented with proprietary parts).
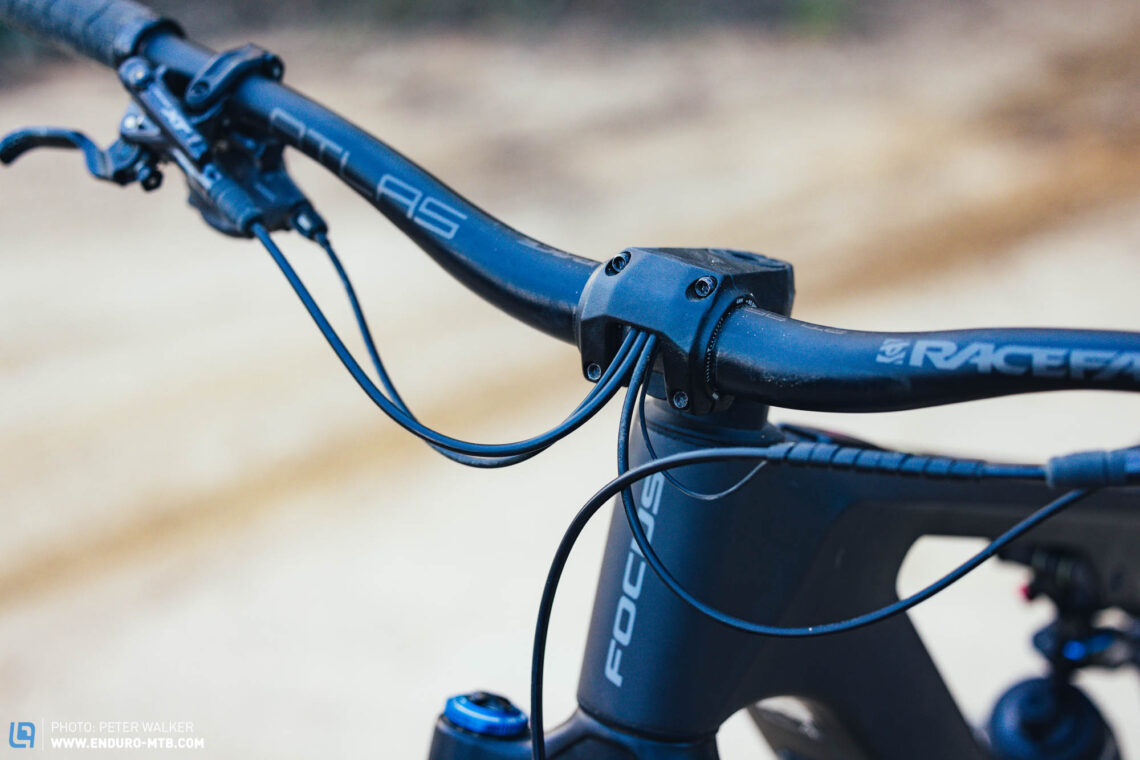
The spaghetti monster: FOCUS CIS
The FOCUS CIS cockpit integration solution can be considered as one of the precursors of the internal headset routing. The system ensures a distinctive look and has been given all sorts of nicknames, from octopus to spaghetti monster and even alien. The cables disappear into the stem through a gap between the handlebars and the stem clamp, running straight into the head tube in a wide arc via two big openings in the stem. For this to work, the system requires a set of spacers with recesses on the sides, which allow you to guide the cables into the headset. In the headset itself, the cables run through the same compression ring that we already know from the “classic” Acros system.
Whatever it is, it certainly makes for a tidy, if somewhat unusual, look.
The FOCUS CIS cockpit integration solution can be considered as one of the precursors of the internal headset routing. The system ensures a distinctive look and has been given all sorts of nicknames, from octopus to spaghetti monster and even alien. The cables disappear into the stem through a gap between the handlebars and the stem clamp, running straight into the head tube in a wide arc via two big openings in the stem. For this to work, the system requires a set of spacers with recesses on the sides, which allow you to guide the cables into the headset. In the headset itself, the cables run through the same compression ring that we already know from the “classic” Acros system.
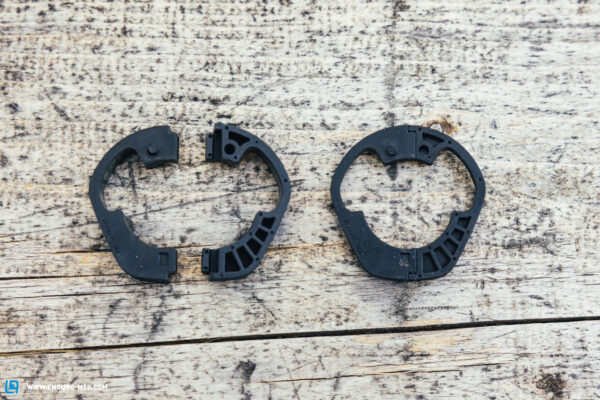
As soon as you start disassembling the system, you’ll quickly realise that there’s very little room to move. Everything is tightly connected to the handlebars and stem, and as soon as you remove the fork and let go of the handlebars, the cables pull half of the headset out with them. This makes cleaning and regreasing the bearings a rather difficult task, because the cables pull on the bearings, making the whole procedure a little harder than you want it to be. If you adjust the cockpit height by adding spacers under the stem, we recommend lowering the fork first, because otherwise there’s very little room to add the spacers. However, the spacers are mercifully split in two, allowing you to add or remove them without having to disconnect the brake lever or shifter. To split the spacers, you have to pull the two halves apart in a vertical motion – and press them together to install them. However, the two-part spacers won’t fit under the top cap of the stem. Here you’ll have to use either a conventional round spacer or cut the steerer tube to the desired size. Moreover, installing and removing the spacers requires a generous range of vertical motion, which the CIS system doesn’t allow for. The individual spacers interlock with one another via a small pin, which prevents them from moving. When you put the fork back in, you wish the pins locked in tighter, because the spacers come apart every time you pull a cable – that’s just annoying! If you’re not an octopus, you’ll quickly throw a hammer through your workshop window. To avoid a nervous breakdown, you should ask someone to help you, even if you are a seasoned mechanic.
Examples of bikes available on the market with the FOCUS CIS system: FOCUS JAM² SL 9.9, FOCUS JAM 8.9, FOCUS SAM² 6.9, FOCUS JAM² 6.9.
Scotty, integrate me aboard: SCOTT’s solution
The people at SCOTT know one thing or two about integration. After focusing on building superlight bikes for several years, the Swiss manufacturer is now determined to provide their lightweight constructions with the highest possible level of integration. Needless to say, their bikes look extremely tidy, with the cables disappearing into the headset through an opening under the stem. From here, they run into the headset through a stack of slotted, two-piece spacers and straight into the frame via the good-old Acros compression ring. The square-edged shape and distinctive flared plastic ports ensure a rather futuristic look.
SCOTT rely on their elegant cable routing system not only for their own bikes, but also for those of sister company Bold.
The people at SCOTT know one thing or two about integration. After focusing on building superlight bikes for several years, the Swiss manufacturer is now determined to provide their lightweight constructions with the highest possible level of integration. Needless to say, their bikes look extremely tidy, with the cables disappearing into the headset through an opening under the stem. From here, they run into the headset through a stack of slotted, two-piece spacers and straight into the frame via the good-old Acros compression ring. The square-edged shape and distinctive flared plastic ports ensure a rather futuristic look.
SCOTT don’t want you to peek through the headset, so they use an additional plastic cap to conceal the stem bolts. Once you’ve loosened the stem and removed the fork, the single components of the upper headset assembly come flying towards you as soon as you pull a cable. You should also be careful with the flared plastic ports, which could leave a nice little souvenir on your hands with their sharp edges. Adding and removing spacers works the same way as with the FOCUS CIS headset. In this case, too, the spacers are split, requiring a generous range of vertical motion to clip them together or split them apart. If you remove a spacer to lower the cockpit, you’ll have to replace it with a conventional spacer under the stem cap, because the proprietary spacer you just removed doesn’t fit due to its peculiar shape. That said, SCOTT’s in-house handlebar/stem unit doesn’t allow for fine tuning, forcing you to cut the steerer tube if you want to reduce the stack height. Like the FOCUS CIS, SCOTT’s system makes it a little harder to service the headset and can be a real pain to reassemble once you’re done. Things get tricky already when forcing the cables into the compression ring between the steerer tube and bearing. We really struggled to do this, especially with the SCOTT Lumen eRIDE 900, which has an additional cable for the shock’s remote. High-end bikes with electronic drivetrains and wireless dropper posts obviously don’t have this issue. Once the compression ring is firmly in place, you’ll have to restack the spacers under the stem. While these are securely connected with an interlocking pin, the assembly requires at least two people, with one person holding the headset together and the other one pushing the steerer tube through the headset – it’s not rocket science, but almost!
Examples of bikes available on the market with the SCOTT system: SCOTT Genius ST Tuned 900, Scott Lumen eRIDE 910 and 900 SL, Bold Unplugged Ultimate.
Spanish Special: Orbea’s own creation
Orbea joined our headset routing party with their very own creation, which is the only system in this comparison that isn’t based on the Acros concept. From the outside, it makes a very high-quality impression and, unlike the other systems, relies mostly on aluminium parts rather than plastic. The cables disappear into a fancy alloy cover and run through a stack of slotted aluminium spacers directly into a second headset cover. Two plastic plugs seal the holes on the cover and at the same time prevent the cables from rattling. The compression ring between the steerer tube and bearing is made of plastic and completely open on one side.

Inside the frame, the routing is rather disorganised, leading to nasty chafing on the cables. Fortunately, in this case it was just the shifter cable.
Orbea’s proprietary system is the only one in this comparison to rely mostly on aluminium parts, from the spacers to the caps – fancy!!
However, when you start disassembling the system, you’ll see parts piling up on your workbench, wishing you had documented each step of the process with your phone camera. Unlike similar systems, the two halves of the Orbea spacers aren’t don’t have interlocking pins, developing a life of their own as soon as you take the stem off. As if this wasn’t stressful enough already, the headset’s upper cover is incredibly tight, making it even harder to pull out the steerer tube. On our bike, a look inside the headset revealed a couple of heavily damaged cables. However, this isn’t because the cables are routed through the headset, but rather because they run in a wide arc, which causes them to rub against the steerer tube and the frame. Adding and removing the two-piece alloy spacers is easier than with other systems, because the two halves of each spacer interlink rather than interlocking with the other spacers, thus requiring a smaller vertical motion range. And if you’re still smiling after installing the spacers, you’ll quickly change your expression as soon as you try to reassemble the system. Your biggest enemy is the compression ring between the steerer tube and the bearing, which needs to be positioned carefully for the slots on the cap and spacers to match. However, this isn’t clear right away and on top of that, you’re already struggling to push the cables into the slots, meaning that you’re most likely to understand how the system works when it’s already too late, while realising that the top cap doesn’t fit. This is already a big challenge in itself, because the cables push outwards when fitting the cover, dislodging the spacers in the process. Last but not least, you’ll have to stuff the rubber plugs back into the recess together with the cable, which could result in a nervous breakdown since you’re already holding onto your last bit of patience. Although the Orbea system makes a very high-quality, beautiful impression, it was the most finicky and complicated to install in this comparison – in our case, it took three people to get everything back in place.
Examples of bikes with the Orbea system available on the market: Orbea Rise M-LTD, Orbea WILD M-LTD.
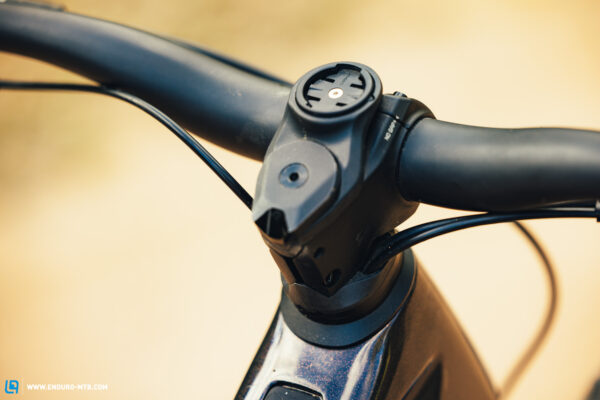
What are the pros and cons of the internal headset cable routing?
Your typical comment section troll would choke on his morning coffee just by reading the words “advantage” and “headset routing” in the same sentence. However, the advantages of internal headset routing systems are undeniable. First off, they ensure an overall cleaner look, because they allow bike manufacturers to dispose of cable ports on the frame and to run the cables closer to the handlebars. Needless to say, this ensures a much tidier frame silhouette compared to bikes with conventional internal cable routing. However, everyone has their own idea of aesthetics, so it’s up to you to decide whether the cleaner look is worth the hassle. In addition, the cables are significantly shorter, ensuring a much quieter ride. Furthermore, internal headset routing offers significant advantages for bike manufacturers, although these might not be obvious at first. To start with, frame designers can stop racking their brains with innovative cable port designs, which might seem small details but still need to be developed, produced, and positioned on the frames. Instead, they can just rely on existing third-party solutions, which saves both costs and resources. It’s a similar story with the assembly of the bikes: in the head tube, there’s plenty of space to grab the cables, which makes it easier to route the cables through the headset than through small cable ports. Moreover, bike manufacturers who cater for the British market can finally stop worrying about moving the brakes to the wrong ;) side of the handlebars, and when using wireless drivetrains, unused cable ports are no longer an issue! The cables simply disappear into the headset.
As you’d expect, the biggest drawback of internal headset routing is the complexity of the systems and the additional effort they require to work around the cockpit area – especially when servicing the headset. While cleaning and regreasing the bearings is relatively easy, replacing them can be a daunting task. To do this, most systems require you to remove the brake levers and bleed the whole system once you’ve re-installed them. But let’s be honest: if it’s time to change the headset bearings, you might as well give your brakes a good bleed. With the cables routed into the headset and through the stem spacers, adjusting the stem height is a lot more difficult. Despite relying on split spacers, all of the systems we’ve looked at can quickly convert an easy task like changing your stem height into a real nightmare, requiring more than two hands in most cases. And that’s going to be expensive in the long run, regardless of whether you ask your mates for help in return for a few pints or decide to trust your bike to your local bike shop. Finally, the compression ring between the steerer tube and bearing is a real weak point, and can shatter into a million pieces with head-on collisions – we know that for a reason!
Quick fire: a brief Q&A about internal cable routing
Why are all manufacturers suddenly jumping on the internal headset cable routing wagon?
For manufacturers, internal headset cable routing only offers advantages. Many prospective customers still buy their bikes based on looks rather than performance, so a clean appearance is an excellent selling point. In addition, not having to worry about cable ports on the frame saves time and money, both in the development stage and during assembly.
Which type of cable routing makes more sense for me as a home mechanic? Are internal headset routing systems harder to service?
In a nutshell, bikes with external cable routing are still the easiest to work on. Internal cable routing with guide sleeves requires only slightly more effort but with the cables running through the headset, servicing the cockpit is significantly harder. Cleaning and greasing the bearings is still relatively easy, but replacing them requires you to detach the brake lever from the brake line. If you’re not prepared to put in the work yourself and prefer to take your bike to a workshop, you’ll have to pay for a brake bleed on top of the headset bearings.

What are the biggest differences between the various internal headset routing systems?
The biggest difference is whether the cables are routed through the stem spacers or not. If they run directly into the upper bearing cover, assembling and disassembling the system requires hardly any additional effort, and the stem height can be adjusted as with a conventional cockpit. It’s a different story with systems that route the cables through the stem spacers, which ensure a tidier look but also make servicing a lot more complex. None of the systems in this comparison can be reassembled by just one person.
Does the cable routing affect the durability of my bike?
Usually it doesn’t. Whether external or internal, all cable routing systems will eventually lead to chafing, both on the cables and the frame. Of course, this also depends on how thoroughly the system was installed. However, we recommend keeping an eye on all critical frame spots, which is always easier on a bike with external cable routing. Out of all the systems tested here, Orbea’s concept is the only one which led to major chafing. However, this isn’t so much due to the system itself, but rather down to the messy routing at the transition from the head tube to the main frame.
What does the future have in store for us?
Let’s get our shiny crystal ball out of the attic and take a glimpse into the future. As already mentioned above, the road bike sector gives us a good idea of what could happen over the next few years. Are we going to ride bikes without cables at all? Although the trend is definitely moving in this direction, there’s one component that makes it hard to imagine a cable-less mountain bike: the suspension fork. And while there’s already a suitable integration concept for most other components, hiding a brake line in a suspension fork is still a huge challenge. On the other hand, the idea of routing the cables directly through the handlebars is becoming more and more realistic, especially since the cables are already routed through the headset.
Although the higher servicing effort required by existing systems still poses a major problem, we’ve already started thinking about suitable solutions. The Bosch ABS system, for example, employs a Magura EasyLink brake hose quick-release connector that allows you to connect and disconnect the brake at the twist of a hand. While this theoretically still needs bleeding afterwards, we’re pretty sure the future will bring systems that won’t need anymore bleeding after disconnecting. As soon as more manufacturers start using similar systems, servicing a headset will be a piece of cake: just connect and disconnect your brake line with a click – awesome! Another solution could be positioning the headset bearing lower in the head tube, which would allow you to route the cables through the top tube just above the bearing rather than threading them through it. From here, the cables run through the frame and straight to where they need to go. What’s still an issue today could be a lot easier in the future. However, at that point, most bikes will probably have just one cable, because everything else – drum roll for our forum trolls – will be wireless!

Our conclusions about the different cable routing systems
One thing’s for sure: no system is perfect and all systems have their pros and cons. As with all innovations, slandering headset cable routing just for the sake of it is wrong. Systems that route the cables directly into the headset top cap require hardly any additional servicing effort while at the same time ensuring a much tidier look. With the cables running through the stem spacers, however, things get more complicated, but only when adjusting the stem height and servicing the headset. So there’s no reason to get heated!
Did you enjoy this article? If so, we would be stoked if you decide to support us with a monthly contribution. By becoming a supporter of ENDURO, you will help secure a sustainable future for high-quality mountain bike journalism. Click here to learn more.
Words & Photos: Felix Rauch